Donald Walker MacDonald was born 6 July 1922 in Glasgow. He joined the Army as a boy soldier aged fifteen. In 1938, at the age of sixteen, he was sent out to Hong Kong where he served with the 2nd Battalion Royal Scots. The battalion had arrived in Hong Kong in January 1938 from India. I do not have a record of which company (Coy) he served in, but in 1975, he recalled in a press interview that he was based at the Shing Mun Redoubt. So we can assume he was with 'A' Coy commanded by Captain Cyril Jones.
'A' Coy consisted of three platoons, one of which was located in the redoubt, and the other two platoons were close to the redoubt. The Coy HQ was situated in an Artillery Observation Post (AOP) at the back of the redoubt.

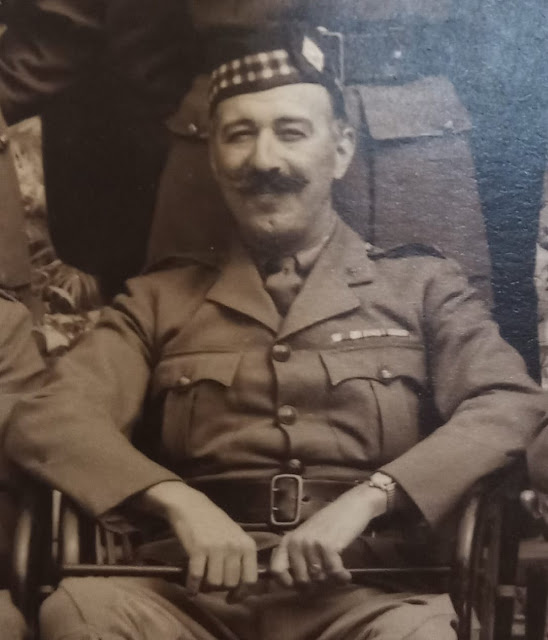
Pte Donald MacDonald wearing the Royal Scots Glengarry -
When the Battle for Hong Kong began in December 1941, the Royal Scots were positioned on the left flank of the Gin Drinkers Line (GDL). The GDL was a ten-mile defensive line that ran across the Kowloon Peninsula from east to west. The line consisted of some ninety pillboxes, minefields, slit trenches and concertina barbed wire anchored by steel pickets known as Dannert wire.

The Gin Drinkers Line
The Royal Scots positions on the GDL extended from Gin Drinkers Bay along a low line of hills referred to as Pineapple Ridge. 'C' Coy were on the left flank, on a headland known as the Texaco Peninsula because of a Texaco port and oil storage facility. 'B' Coy was in the centre of the Royal Scots sector of the line. 'A' Coy were on the right flank of the line including Shing Mun Road, Pineapple Dam and the Shing Mun Redoubt. The redoubt was a strongpoint consisting of a series of concrete tunnels linking five pillboxes and several open-air concrete firing bays. The AOP where Captain Jones had established his HQ was co-occupied by Lt Wilcox, Royal Artillery, and four gunners. It was their job to observe and direct artillery fire from the howitzers positioned behind the line.

Map showing C, B, A and D Coy initial positions and subsequent positions C2, B2, A2 and D2
We can be sure that MacDonald was a member of 'A' Coy because he stated that he was at the Shing Mun Redoubt. This I take to mean, as at or near the Shing Mun Redoubt. However, we don't know which of three platoons in 'A' Coy (No. 7, No. 8 and No. 9) he was serving with.
No. 7 and No. 9 Platoons were located around Shing Mun Road leading to Pineapple Dam and the Shing Mun Redoubt. No. 8 Platoon (the Shing Mun Platoon) commanded by 2/Lt Thomson was based at the redoubt and was responsible for the defence of the strongpoint. The Shing Mun Platoon (No. 8 Platoon) consisting of 26 other ranks was insufficient a force to man a complex of this size and at the same time carry out moving and static patrols. However, inadequate manning was a feature throughout the GDL and throughout the Battle for Hong Kong. Hong Kong had become an isolated outpost, a strategic liability. Churchill recognised this when he wrote to his military adviser, regarding a request for reinforcements, and commented that there was not the slightest chance of holding or relieving Hong Kong if it were attacked. The priority for men and equipment in the Far East was Malaya and Singapore. Singapore was the impregnable fortress and Hong Kong would be sacrificed but not without a fight.

A Royal Scots officer on the Gin Drinkers Line
The redoubt was captured during the night of Tuesday 9 December. It was the second night of the battle. It was captured by Colonel Doi's 228th Infantry Regiment consisting of three battalions each consisting of approximately 1,000 men. The AOP was blown open, two Indian other ranks serving with the Royal Artillery were killed. The surviving gunners and 'A' Coy HQ personnel were taken prisoner. One of the pillboxes was hit by British artillery fire and the four Royal Scots holding the PB were dug out by the Japanese and became Prisoners of War. Sgt Robb, the Shing Mun Platoon Sergeant, conducted a firefight in which five of the platoon were wounded and left behind. Of the five, one made it back to British lines and one was killed. The remaining three were taken prisoner. We know that MacDonald was not captured at the Redoubt as he stated in correspondence that he was taken prisoner when the crown colony capitulated on Christmas Day 1941 at which time he was injured and in hospital.
Sgt Robb found himself both outnumbered and under fire from different directions. He estimated there were two hundred Japanese (roughly two companies) attacking the redoubt. Robb then extricated with around a dozen men, leaving the five wounded men behind. He withdrew along Smugglers Ridge to link up with 'D' Coy Rajputs commanded by Captain Newton. The names of the men in Sgt Robb's party that reached the Rajput positions are recorded in the battalion war diary.
Sgt Robb
L/Sgt Corbett
L/Cpl Gray
L/Cpl Ralph
L/Cpl Wallace
Pte Gullane
Pte O'Rawe
Pte Stevenson
Pte Archibald
Pte Scott
Pte Still
Pte Wood
Assuming this is a complete list, and since Pte Donald MacDonald is not on the list then we can assume that he was most likely a member of either No. 7 or No. 9 Platoon. After the loss of the redoubt, 'D' Coy moved up to Golden Hill and 'B' and 'C' Coy were moved back to a new line extending south east from Golden Hill towards Lai Chi Kok. 'C' Coy were to the rear of 'D' Coy (see position C2 on the above map). 'B' Coy was to the rear of 'C' with their left flank astride Castle Peak Road and their right flank extending to the ridge line (see B2). No. 9 Platoon of 'A' Coy were deployed to support the left flank of Captain Newton's company. The rest of 'A' Coy (No. 7 Platoon and the survivors of No. 8 Platoon were taken by truck to new positions on the Castle Peak Road (See A2 on map). I think it is likely that Pte MacDonald was part of this group and more specifically a member of No. 7 Platoon.
The evacuation of the Mainland began on the night of 11 December. The Royal Scots were evacuated from Kowloon City to HK Island. No. 9 Platoon under Sgt Richards, which had been deployed with Captain Newton's 'D' Coy Rajputs were evacuated from Devil's Peak Peninsula. Sgt Richards and Pte Chorley, after coming under fire, got separated from both the main body 'D' Coy Rajputs and the rest of their platoon. They were helped by Chinese villagers who supplied them with Chinese clothes. They took a small boat but the current took them away from Hong Kong Island and they ended up getting washed up on an uninhabited island next to Waglan Island. The lighthouse on Waglan Island had already been evacuated. After several days without food and water they were picked up by Chinese fishermen and eventually landed on Hong Kong Island (the Island). They rejoined the battalion on 20 December. Part of the remainder of No. 9 Platoon who scattered during the ambush also took a boat and rowed towards the Island. They were picked up by a British patrol boat who brought them back to HK Island. This party of five members of 'A' Coy and two members of 'HQ' Coy were identified in the battalion war diary.
L/Cpl Phillips, HQ Coy
Bd Cooper, HQ Coy
Cpl Brown, 'A' Coy
Cpl Pennman, 'A' Coy
L/Cpl McVean, 'A' Coy
Pte Ritchie, 'A' Coy
Pte Robertson, 'A' Coy
The brunt of the fighting on the Mainland was in the Royal Scot's sector and they incurred a large number of casualties including the company commanders of 'B' and 'C' Coy who were both killed in action. After the evacuation of British troops from the Mainland, the Island came under siege with heavy artillery bombardment and aerial bombing as a prelude to the Japanese landings. The Japanese landed at three locations on the north east shore of the Island during the night of Thursday 18 December. It is estimated that some 8,000 troops were landed between North Point, Tai Koo and Aldrich Bay. The defenders on this stretch of the shoreline consisted of three Rajput companies, a Canadian infantry company at Lai Mun Gap, a special guard unit of Volunteers at the North Point power station and assorted artillery personnel from coastal defence, howitzer and anti-aircraft batteries. They amounted to less than 800 men. The defenders were outnumbered ten to one. The Rajput battalion was decimated and the Japanese army moved inland and converged on Wong Nai Chung (WNC) Gap from different directions. The following morning the Japanese seized WNC Gap and Brigadier Lawson, commanding West Infantry Brigade, was surrounded at his Brigade HQ at Wong Nai Chung Gap.
On Friday 19 December at 0710, Captain Kenneth Campbell, the newly appointed commander of 'A' Coy, (Captain Jones having been captured) received orders from Battalion HQ at Wan Chai Gap to relieve West Brigade HQ, and extricate Brigadier Lawson and his staff. He had earlier reported that his HQ had been surrounded by Japanese troops and was coming under fire. Major-General Maltby, the military commander, called Lt-Col Simon White, 2/RS, the battalion commander, to stress the importance of 'A' Coy's mission. Lt-Col Simon White told Major-General Maltby that 'A' Coy would go like the 'hammers of hell'. Pte Donald MacDonald, as a member of 'A' Coy, may well have been involved in this operation.
Lt-Col Simon White (Courtesy: Royal Scots Regimental Museum)
'A' Coy were deployed by truck to the petrol station at the there-way junction of Tai Hang Road, Stubbs Road and WNC Gap Road. 'A' Coy came under heavy fire from the western slopes of Jardines Lookout as they tried to make their way up WNC Gap Road (No. 8 Platoon) and Blue Pool Road (No. 7 Platoon) towards West Brigade HQ. At 0815, the Royal Scots Battalion HQ, were advised by Lt-Col Sutcliffe, the commanding officer of the Winnipeg Grenadiers, that Brigadier Lawson had reported that there was no sign of 'A' Coy. 2/Lt Swettenhan, a newly commissioned officer in the Royal Scots promoted from the Volunteers, offered to take out a small patrol to link up with 'A' Coy and report back to Bn HQ. Swettenham and three other ranks departed Wan Chai Gap by car at 0900 hours. They got close to Brigade shelters and noticed that vehicles in the Brigade HQ car park were on fire. In the afternoon a runner from 'A' Coy reported back to Bn HQ that they had got to within 200 metres of West Brigade HQ shelters, but they had been pinned down by heavy fire. They had sustained heavy casualties which included both platoon commanders. 2/Lt Fenwick had been killed and 2/Lt Hart had been wounded. The Coy commander, Captain Campbell, later became a casualty. Sgt Whippey took over as company commander of the depleted 'A' Coy who had fought so gallantly all day. When it became clear that no further advance could be made - Sgt Whippey ordered a withdrawal back to Bn HQ which had now moved to the junction of Tai Hang Road and Stubbs Road near the petrol station. As it happened the Brigadier had left his HQ at around 1000 hours and had been shot in the leg and had bled to death in the road outside his HQ. Some of the Royal Scots from 'A' Coy had managed to fight their way to Brigade HQ but they were all wounded and became trapped in the brigade shelters. These included the four NCOs listed below:
Sgt Arnott
Sgt Corbett
Cpl Campbell
Cpl Glover
Those Royal Scots that reached West Brigade HQ were not seen alive again. Canadian Thomas Barton, a staff seargent in the Corps of Military Staff Clerks, recalled two Royal Scots getting through to Brigade shelters each with an arm almost severed. 'A' Coy had been reduced from seventy-six other ranks to an effective strength of just fifteen men. When the colony surrendered on Christmas Day the Royal Scots had an effective strength of only four officers and 109 other ranks. The rest were dead or wounded.
Donald MacDonald was taken ill with appendicitis and when the surrender came he was in hospital recovering from an appendectomy. The operation was carried out by Surgeon-Lt Commander John Page, RN, most likely at the Royal Naval Hospital in Wan Chai. After release from hospital MacDonald was incarcerated at Sham Shui Po POW Camp. At Sham Shui Po he took part in work parties sent to Kai Tak airfield to extend the airport and construct two new concrete runways to replace what had previously been a grass airfield.
In September 1942, aged twenty, he was included in a draft of POWs sent to Japan to work as slave labourers. He boarded the Lisbon Maru, an armed Japanese freighter, which was carrying some 1,800 British POWs. The freighter was sunk by an American submarine not realising the vessel was carrying POWs. The ship sunk slowly. The Japanese soldiers onboard were disembarked and transferred to other vessels leaving a skeleton crew and a handful of guards. The prisoners had been confined to the holds which had been battened down. The Japanese were planning to let the POWs go down with the ship. However, one of the prisoners had somehow smuggled a butcher's knife aboard the vessel. The prisoners were able to cut their way out, they overcame the guards and freed the POWs in the other holds. The ship was listing heavily and in danger of sinking. It was only after Chinese fishermen started picking up POWS that the Japanese stopped machine-gunning survivors and started to pick them up. MacDonald recalled swimming to one of the Japanese launches and trying to scramble aboard. He was kicked away. He then swam round the other side of the vessel and a British officer helped pull him aboard. The survivors were collected and put ashore in Shanghai. There had been 1, 816 POWS aboard the vessel but on that cold Shanghai dock only 970 answered the roll-call, one of whom was Donald MacDonald. The survivors were put aboard another ship, the Shinsei Maru. The conditions were appalling. The ship was filthy and the POWs were once again placed in tiered bunks in the overcrowded holds. The POWs had lost what little possessions the had. They had virtually no cloths other than what they were wearing when they were plucked from the sea. MacDonald was interned at a prisoner of war camp in Kobe, Japan. where he remained until he was liberated aged twenty-three in August 1945.
In 1975, Donald MacDonald, returned to Hong Kong with his wife Elizabeth. He described his return to Hong Kong as a sort of pilgrimage. As a young man, he had fought in a battle, he had witnessed the horrors of war, the huge loss of life on the Lisbon Maru and the brutality of the prison camps in Hong Kong and Japan. After liberation in August 1945, MacDonald, aged twenty-three, returned home to Glasgow. He had come through it all, everything that fate had thrown his way, and he had survived. This post is a tribute to a brave soldier
....................
Acknowledgements
John C.G. MacDonald for information and photographs in respect of his grandfather (Donald MacDonald).
Royal Scots Regimental Museum for photograph of Lt-Col Simon White
No comments:
Post a Comment