Wednesday 23 February 2022

Pillbox 9

Pillbox No. 9 was a Beach Defence Unit (BDU) consisting of a pillbox (PB) and a separate Lyon Light structure. The Lyon Light (searchlight) was housed in a concrete structure with steel shutters.  It had a crew of two men. A small generator powered the searchlight. Communication between the PB and the Lyon Light (LL) structure was effected by voice pipe. The LL structure was normally 10 to 50 metres away from the PB and usually situated above the PB. The PB had telephone connection with Company (Coy) HQ and the other pillboxes in their platoon/group. PB 9 was situated on Aberdeen Praya Road looking southwards towards Ap Lei Chau (aka Aberdeen Island). It was located to the west of the Aberdeen naval base and dockyard. The PB and LL has long been demolished, but I found there is a photo (see below) showing the LL structure on local history web site 'Gwulo.com'.  Click the link. https://gwulo.com/atom/22417 

LL 9 on Aberdeen Praya. (Source: Gwulo.com)

In the photo, which I believe is dated 1940, you can see the closed steel shutters in the searchlight aperture and the ventilation shaft with its spoked ducts. The PB was probably located at the waterline and close to the LL. The Beach Defence Unit (BDU) was manned by soldiers from 'A' Coy 1/Mx. The company was commanded by Captain Hudson who was responsible for the PBs from No 1 at Sandy Bay to No. 11 on Ap Lei Chau (Aberdeen Island). These 'A' Coy pillboxes are illustrated in the extract from the wartime map shown below. It will be seen that PBs 10 and 11 were located on Aberdeen Island.

Wartime map showing 'A' Coy 1/Mx PBs 1 to 11

'A' Coy 1/Mx shared their Coy HQ with 'B' Coy Winnipeg Grenadiers at Pok Fu Lam Reservoir. 'A' Coy had three platoons (4, 5 and 6)

No 4 Platoon (PBs 1, 3, 4 and 5) Initial Platoon Cdr 2/Lt Wynter -Blyth

No 5 Platoon (PBs 6, 7, 8 and 9) Initial Platoon Cdr 2/Lt K.D. Cole (later 2/Lt Newton)

No 6 Platoon (PBs 10 and 11) Initial Platoon Cdr 2/Lt P. A Newton.

PB 9 was commanded by Sgt Thomas Richard Montague Castle. He was born February 1908 in Middlesbrough, North Yorkshire. He joined the army, aged eighteen in 1926. He was promoted to full sergeant in 1937. He was a regular soldier with fifteen year's experience by the time war started in Hong Kong.  Road blocks were established near PB 8 (Cpl Kendall) and at PB 9 (Cpl Reeves).

During the first week there was a lot of bombing and shelling in the Aberdeen area. Following the Japanese landings on the Island  - Sgt Castle (and possibly his ten-man crew) was dispatched to fight in an infantry role.  

Extracts from 1/Mx War Diary:

Tuesday 16 December: Heavy air raids on Aberdeen. PB9 had a severe time but no casualties.

Wednesday 17 December:  A stick of bombs was dropped in Kellett Bay which narrowly missed PB 7.

Friday 19 December: One section under Sgt Castle under the command of 2/Lt Newton sent to support Winnipeg Grenadiers (WG) at Shelter E1-1.

Saturday 20 December:  The party under 2/Lt Newton  occupied Shelter E1-1 during night 20/21 replacing 'B' Coy WG.

Sunday 21 December: Orders received from GSO-1 [senior staff officer] that all PB crews were to be held in readiness to move to any part of the Island. ... Two sections under 2/Lt Newton  sent for defence of Aberdeen Industrial School [naval base] of which one section under Sgt Castle sent to position south of Bennet's Hill.

Monday 22 December: Half of 'A' Coy were deployed around Bennet's Hill defending the approaches to the naval base at Aberdeen Industrial School. The other half were deployed on the north shore (Wan Chai area).

Thursday 25 December: Sgt Castle's section south of Bennet's Hill was shelled and L/Cpl George Barkway was killed and one Vickers MG was hit and destroyed.  At 1600 hours the order was received  to cease fire, cease hostilities.  

Sgt Castle was interned at Sham Shui Po POW Camp. In September 1942, he was drafted with other members of 1/Mx to work as slave labourers in Japan. He boarded the ill-fated armed Japanese freighter, the Lisbon Maru. The freighter was sunk by an American submarine not realising that the vessel was carrying some 1,800 British POWs. Sgt Castle survived the sinking, but not long after arriving in Japan, in a weakened state, he died of dysentery at Hiroshima Military Hospital.


...................

Acknowledgements & Sources:

Russell Timmins (Information relating to Sgt Castle).
Gwulo.com (Photo).
UK National Archives (1/Mx War Diary - WO 172/1689).


Monday 21 February 2022

The landings on HK Island and subsequent movements by 230th Infantry Regiment (the Shoji Butai)

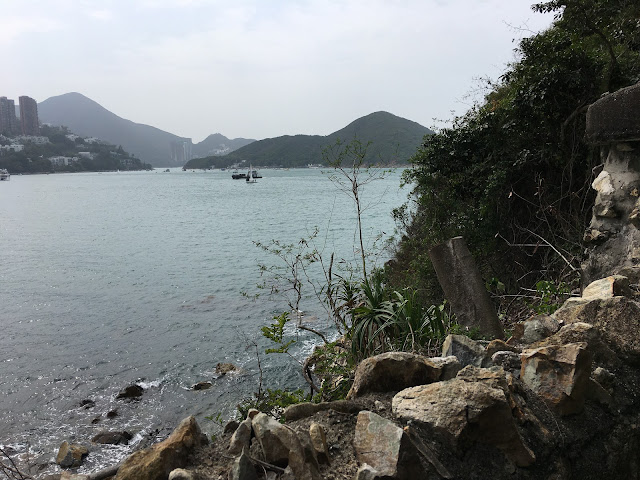
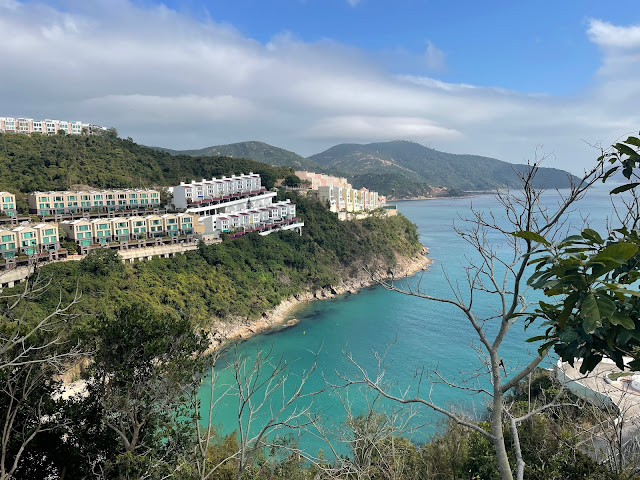
On the night of the 18 December 1941, three Japanese infantry regiments landed on the northeast shore of Hong Kong Island. Each regiment deployed two of its three battalions. One battalion in each regiment being held back to be used under divisional command. A Japanese infantry battalion consisted of approximately 1,000 men. In addition to the infantry battalions there was artillery, gendarmes, engineers and  other units being landed during the course of the night. One can reasonably assume that some eight thousand Japanese troops got ashore that night of which six thousand were frontline infantry. During the night, and during the course of the following morning, the bulk of this force converged from different directions on Wong Nai Chung (WNC) Gap.

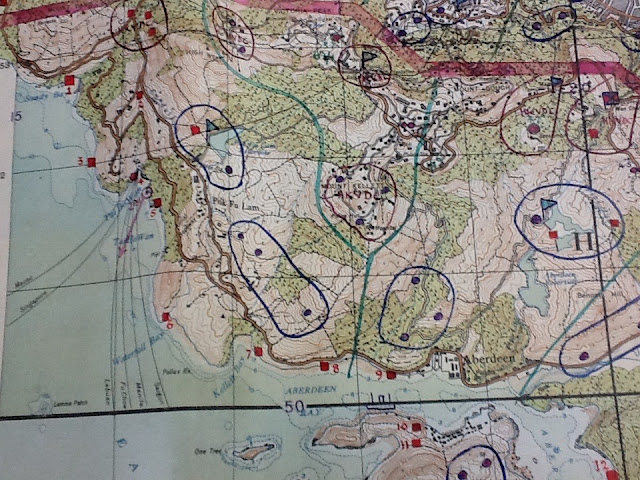
Broad direction of Japanese advance  following landings on the north shore

The Japanese overran the defenders on this section of the north shore. The ratio of the invader to the defender was greater than ten to one. There were 8,000 invaders and no more than 700 to 800 defenders (see calculation below). 

The Defenders:

The British deployed one infantry battalion, the 5th Battalion 7th Rajput Regiment to defend this 5 kilometre stretch of the shoreline between North Point and Shau Kei Wan. The battalion deployed three companies, 'D' Coy (Capt. Newton) at North Point, 'A' Coy (Capt. Ansari) at Shau Kei Wan and  'C' Coy and HQ Coy at or around Tai Koo. The battalion commander Lt-Col Cadogan-Rawlinson had his battalion HQ located at Tai Koo Police Station. He had one company, 'B' Coy (Captain Course) in reserve at Tai Hang. The defenders included:

Three companies of Rajputs and Bn HQ (estimate 450)

Hughes Group at North Point Power Station (estimate 40)

Pak Sha Wan coastal Defence Battery (estimate 40) 

'C' Coy Royal Rifles of Canada at Lye Mun Gap  (estimate 120)

Sai Wan AA Fort (estimate 40)

Sai Wan 6-inch Howitzer Section (40)

Lye Mun Barracks 3.75-inch Howitzer Section (10)

Middlesex Flying Platoon survivors at HKE power station (10)

Estimate:  750


The Defence of the hills inland from the landing area 


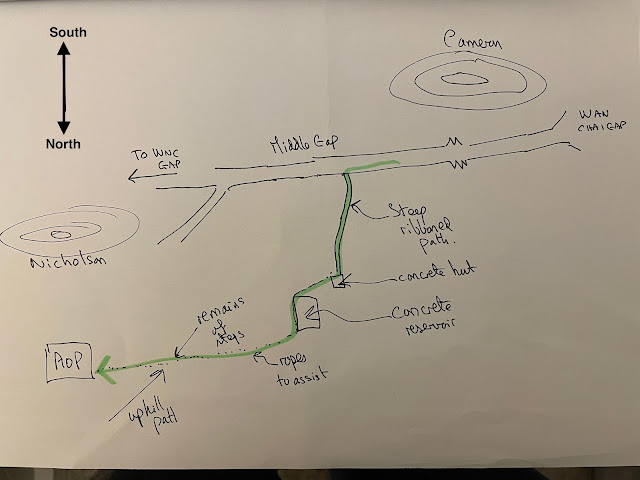
(1) At Wong Nei Chung Gap and Stanley Gap:

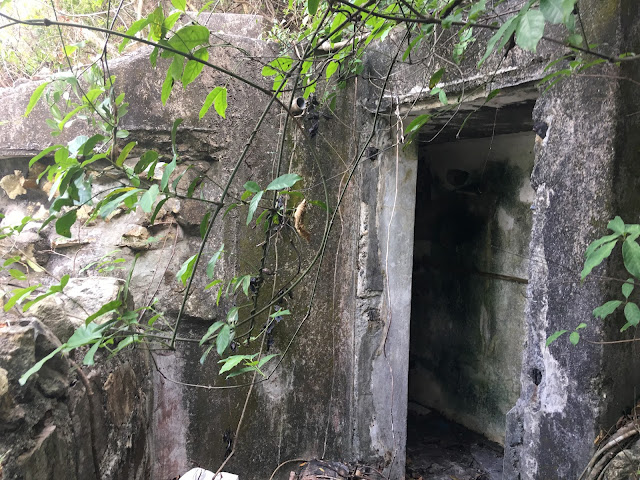
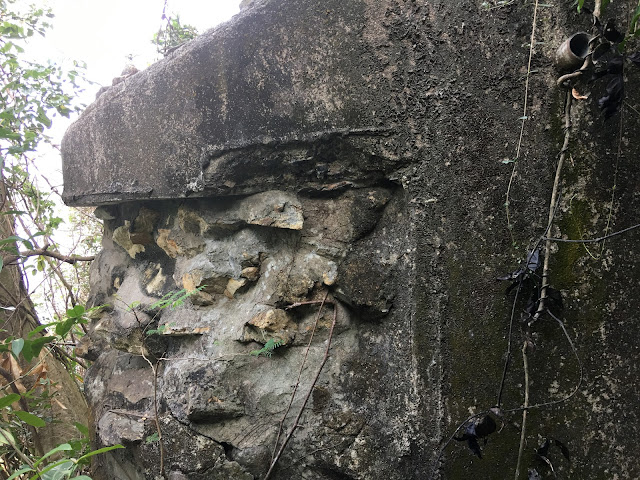
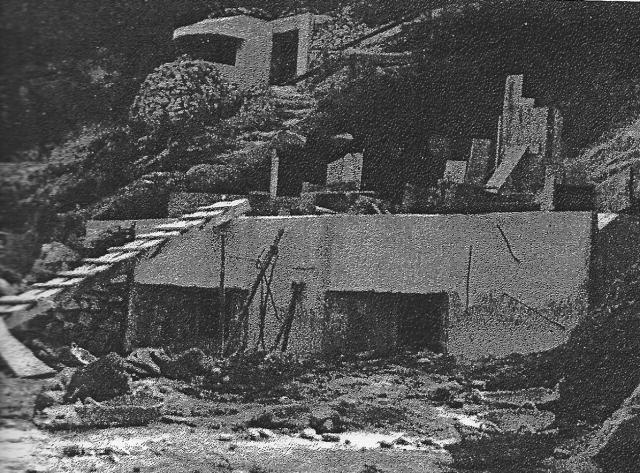
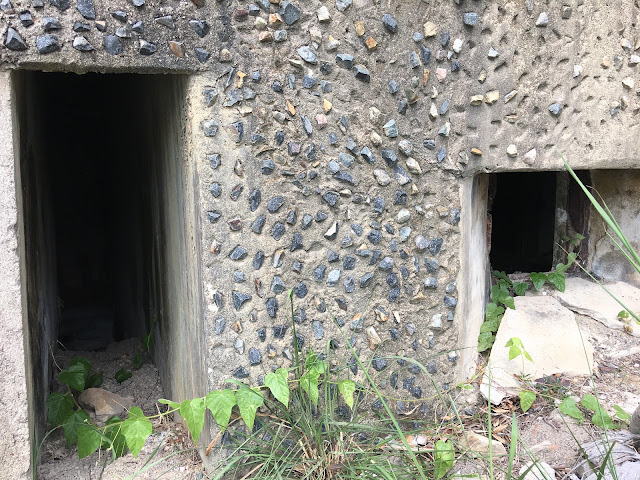
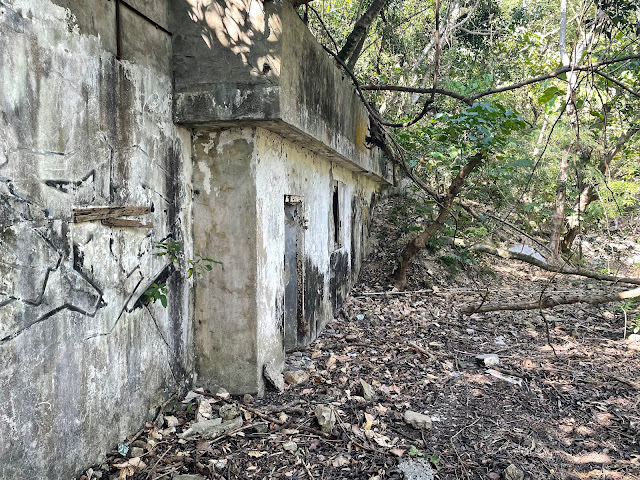
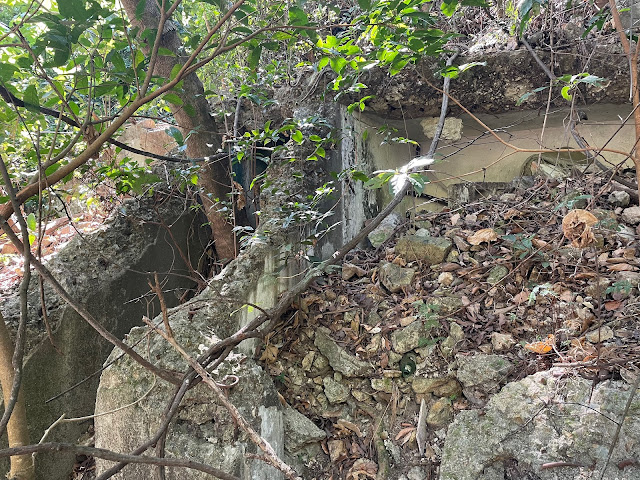
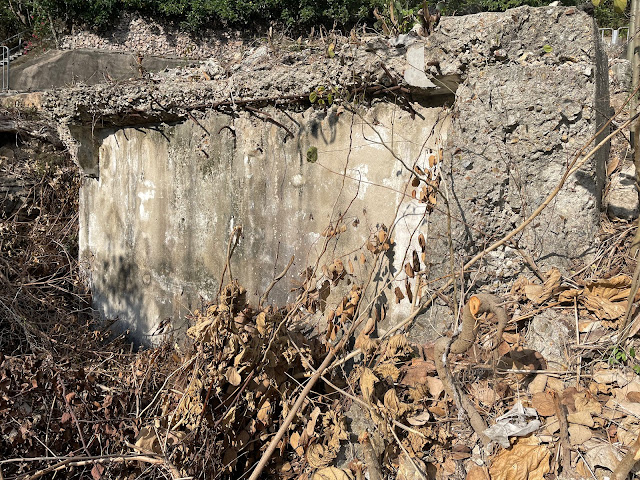
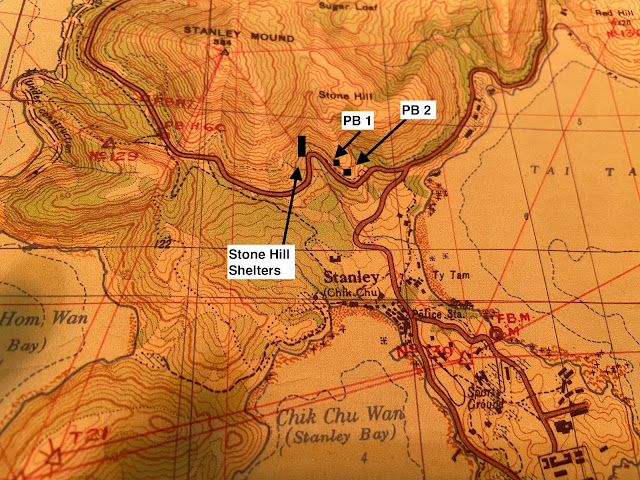
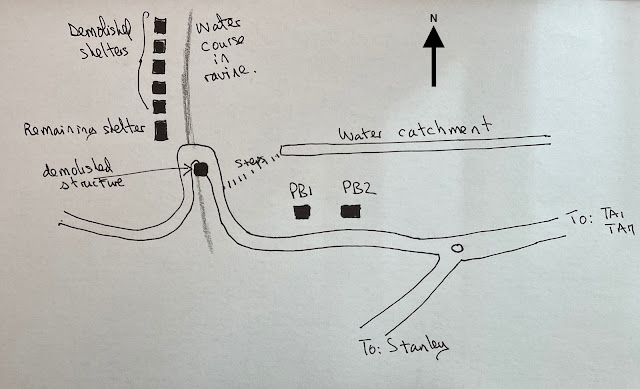
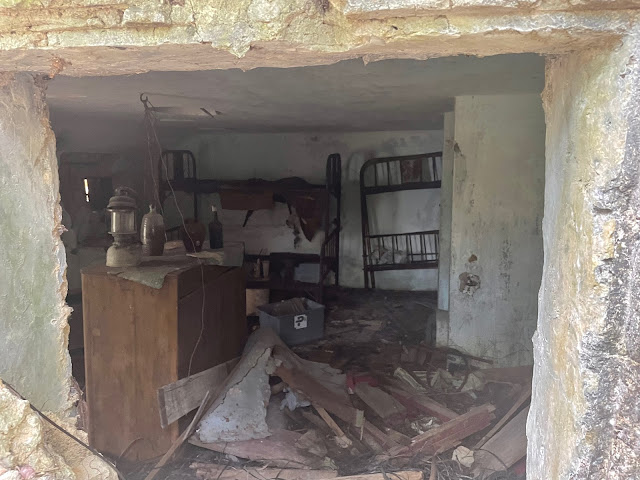
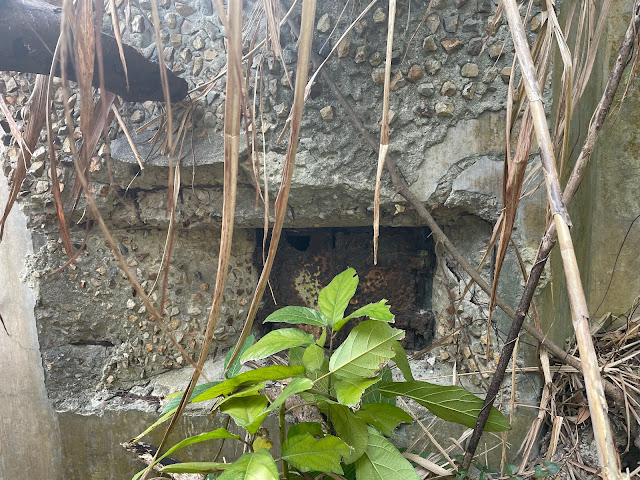
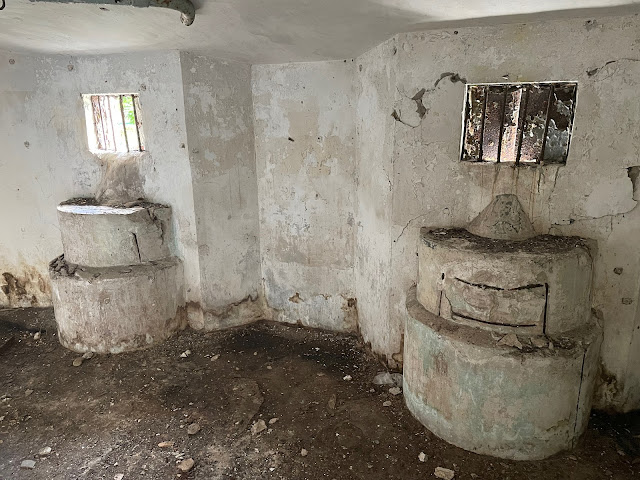
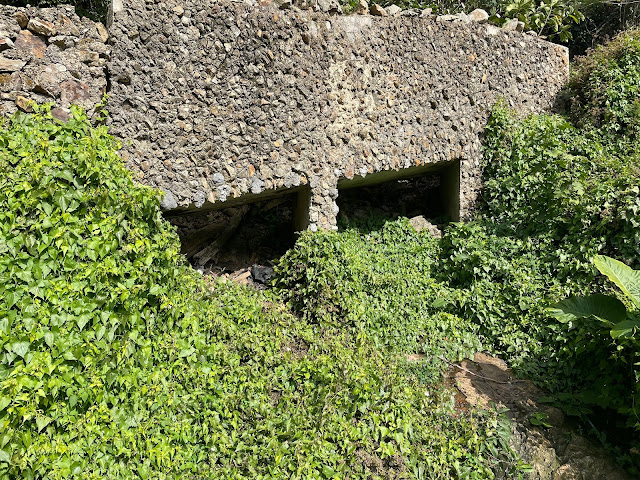
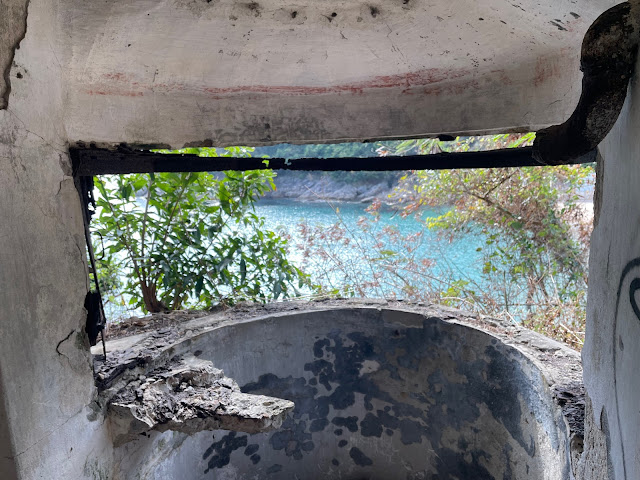
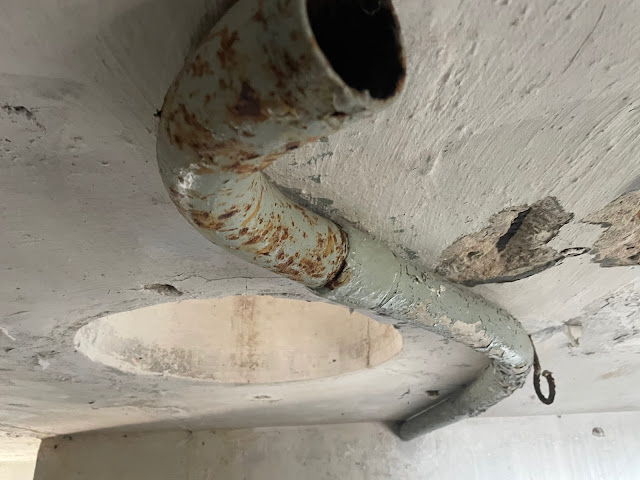
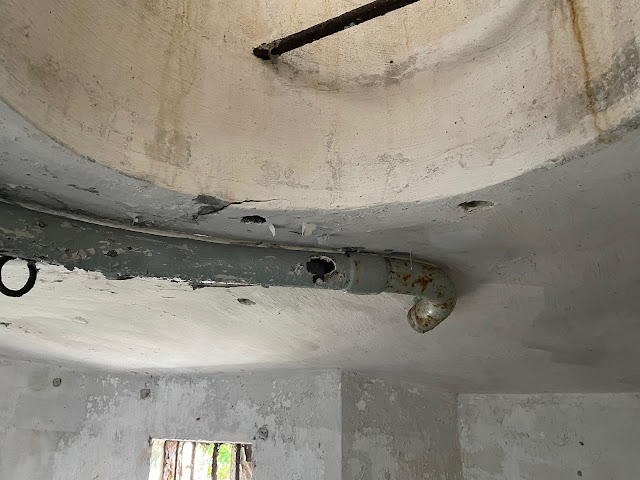
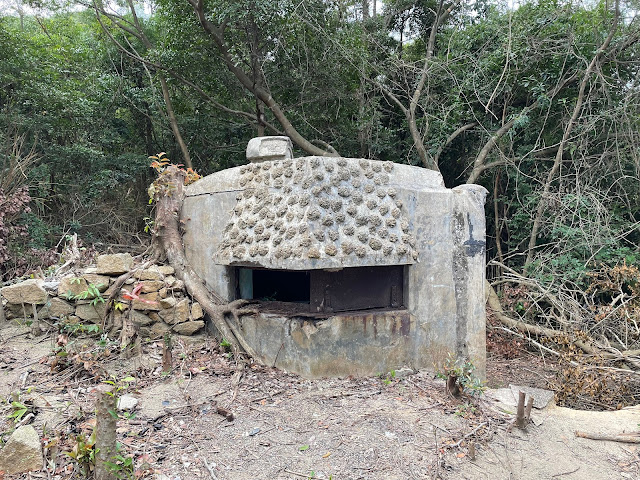
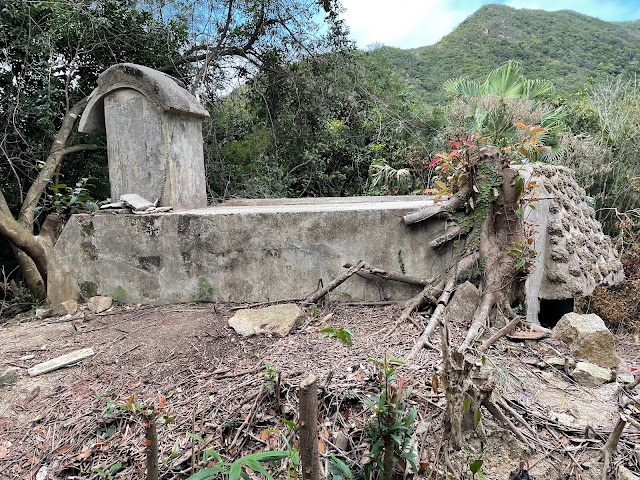
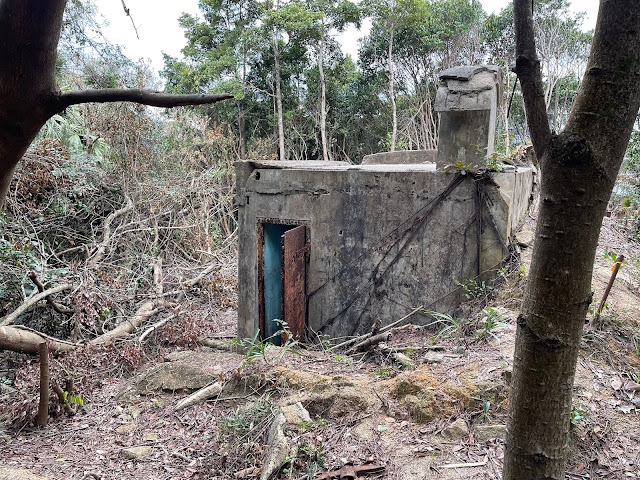
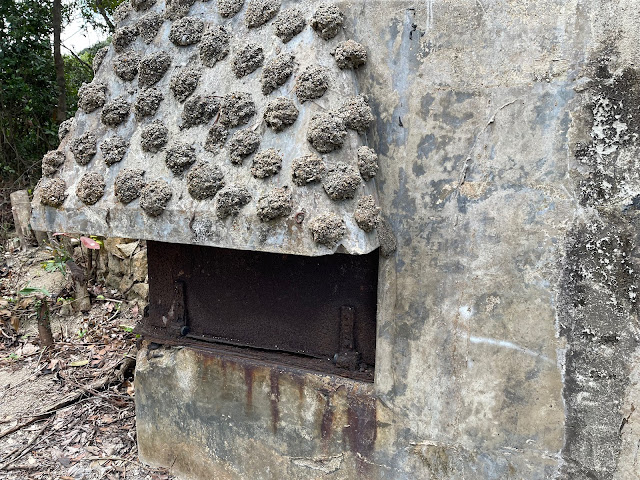
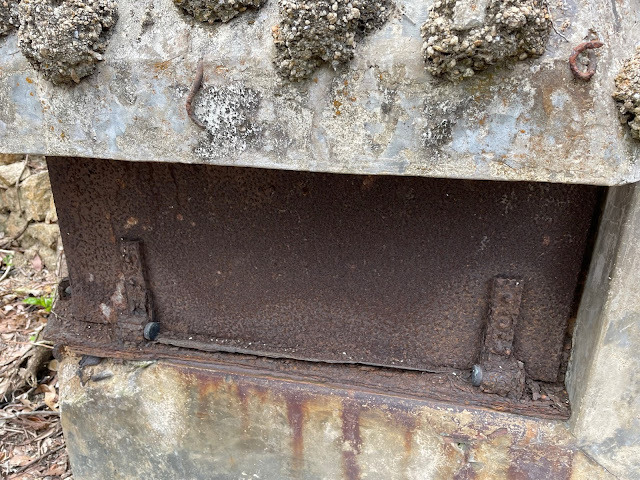
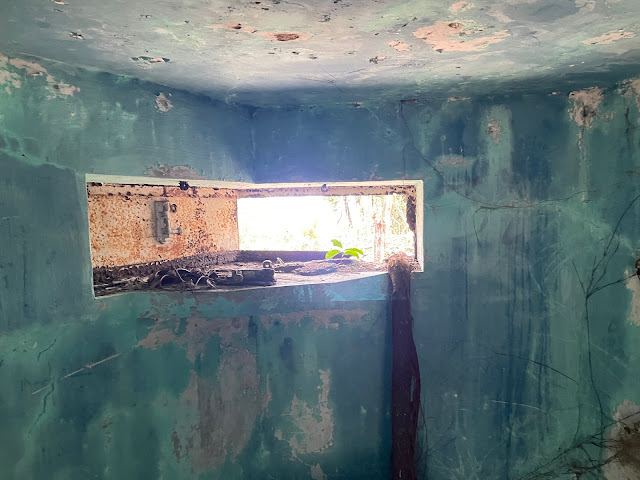
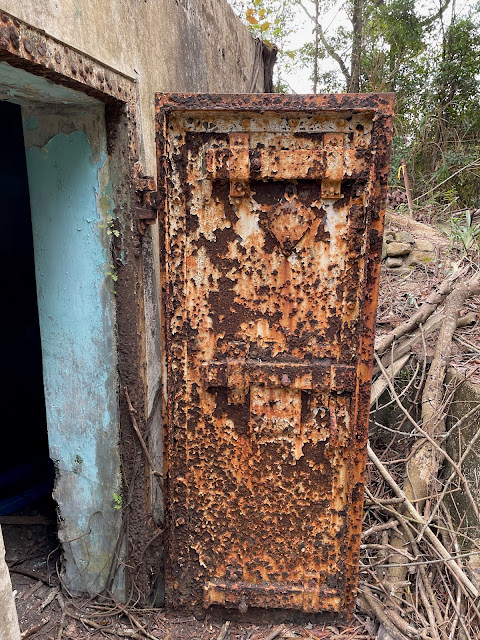
No. 3 Coy HKVDC manning PBs 1 and 2 and section posts including JLO 1, 2 and 3  and various roadblocks. Major Evan Stewart had established his Coy HQ in a splinter proof shelter under AA battery. (Estimated Coy strength 120) 

Stanley Gap 3.7-inch AA battery. Two AA guns.  (estimate 60)

Stanley Gap 3.7-inch howitzer battery.  Three guns.  (estimate 70)

'D' Coy Winnipeg Grenadiers close to WNC Gap with splinter proof shelters located between WNC Gap Road and the upper section of Blue Pool Road. At that time Blue Pool Road extended from Tai Hang Road to WNC Gap.  (estimate 120)

No 1 Platoon No 1 Coy HKVDC at Quarry Gap (aka Sanatorium Gap) and at PB 45 on Mt Parker Road (north side the gap). (estimate 30)

Estimate: 400


(2) Reinforcements sent up into the hills on the night of the Japanese landings

Lt Birkett's platoon (from HQ Coy) were sent in two trucks from Winnipeg Grenadiers HQ at Wan Chai Gap. Burkett in one truck and his Platoon Sgt, Tom Marsh, in the second truck. (estimate 30)

Lt French's platoon (from HQ Coy)  (estimate 30)

Major Gresham's 'A' Coy (estimate 120)

Estimate:  180


Taking all the estimates, for the north shore, Stanley Gap, WNC Gap, Quarry Gap  and the JLO ridge-line we have a total of 1,280 in the area facing c. 8,000. The Japanese were able to concentrate their forces. The Japanese troops that landed on 18/19 December all converged on WNC Gap. The British counter attacks that followed were often carried out by inexperienced troops like the RN contingent fighting as infantry, HKSRA gunners and Royal Engineers. When regular infantry was deployed it was more often in company strength rather than battalion strength. 


The 230th Infantry Regiment commanded by Colonel Shoji - the landings and the initial movements

The Shoji Butai, consisting of the Second and Third Battalions (2/230 and 3/230) of the 230th Infantry Regiment, landed 500 to 600 metres to the east of North Point. They landed between 2150 hours and 2400 hours.  Colonel Shoji came ashore with the second wave  at approximately 2240 hours. After some thirty minutes, Shoji's HQ group moved inland and uphill to what he described as the west bank of a large lake but what was in fact Braemar Reservoir. Here he established his Regimental HQ. He described this as being some 800 metres due south of the landing area. The reservoir was filled in after the war and built over. It is now accommodates Braemar Hill Mansions and an adjacent park known as Choi Sai Soo Park.

Communications with other units including Divisional HQ were not completed until 0230 in the early hours of Friday 19 December. Colonel Shoji then moved his HQ party uphill to a path known as Sir Cecil's Ride. This path led around the north face of Jardine's Lookout to WNC Gap. He arrived at the north side of Jardine's Lookout (point K on the map below) at 0330 hours. At that location the commanding officer of the Third battalion (3/230) advised Colonel Shoji that:

A. "The pillbox defences on Jardine's Lookout ('JLO')  were mainly manned by Indian troops. Their strength unknown". (1) It is not clear what is meant by this. There was an AOP on the summit of JLO perhaps this was meant. It may well have been manned by Indian gunners from HKSRA. 

B.  "The Umino raiding patrol had captured, at 0140, the pillboxes on Jardine's Lookout thoroughly defeating the British force. Lt Umino plus five others were killed in this action". (1) This probably referred to the forward defended localities known as JLO 1, 2 and 3. These were section positions with wire entanglement and an MG positioned in a weapons pit or emplacement. These forward defended localities were manned by HKVDC No 3. Coy.

C. The planned advance route proved to be narrow and poor and the unit could only advance in two files

Colonel Shoji then gave the following orders:

(a) Third Battalion (3/230) would proceed along Sir Cecil's Ride  and head towards WNC Gap.

(b) Second Battalion (2/230) would attack and overpower British resistance  on the left flank (i.e. the Jardine's Lookout Ridgeline which overlooked Sir Cecil's Ride and then proceed "through Jardine's Lookout  to the 5-road junction" (WNC Gap). 

Shoji noted (1) that by 0500 hours both battalions were ready for the attack.  Shoji followed the Third Bn along the Ride with the two reserve companies heading towards WNC Gap. Soon both battalions were in action.

"Not only was fierce rifle fire heard from the direction of the Second Battalion, but suddenly from the area of the 5-road junction (WNC Gap) fierce rifle fire and movements of armoured units were heard. "(1)

There were no armoured units operating in WNC Gap at that time. However, at or around dawn, PB 1 opened fire as Shoji's troops (3/230) reached WNC Gap. A large number of casualties were incurred as Japanese troops went eastwards and uphill to attack the Stanley Gap AA Section and westwards to attack the police station at the gap and to picket the Advanced Dressing Station (ADS) situated at the junction of the upper section of Blue Pool Road and WNC Gap Road. 

The Second Battalion (2/230) reached the JLO ridge-line after fanning out and advancing uphill from Sir Cecil's Ride. They were in a firefight with Lt Birkett's mobile platoon around the Artillery Observation Post (AOP) on the summit of JLO.  They also bumped up against 'A' Coy Winnipeg Grenadiers and Lt French's mobile platoon in the gap or shoulder between Mt Butler and Jardines Lookout. 

Sgt Tom Marsh, Lt Birkett's Platoon Sgt, saw 'A' Coy already in a fighting retreat as his platoon reached the AOP and described them as being some 200 metres to the east of the AOP. Lt French and Lt Birkett's mobile platoons, both from HQ Coy, WG, hd been trucked from Wan Chai Gap during the night to defend these two positions. 'A' Coy had been sent up from their base at Shouson Hill. Their orders were to proceed to Jardine's Lookout and then to move to Mount Butler.  By dawn all three Canadian units were under attack and during the morning and early afternoon they were overrun and destroyed. 

The Commander of the Second Battalion (2/230) reported to Colonel Shoji that the British, it was in fact 'A' Coy WG, "were retreating towards the east and south east ravines in front of advancing Japanese troops. The battalion was expected to rendez-vous in the area of the captured anti-aircraft defences [Stanley Gap]". (1) 

The Doi Butai later joined the attack attacking from the east and from the rear. The Canadian company ('A' Coy WG) were retreating back to Stanley Gap where they had de-trucked and started their deployment. During this fighting retreat the Coy Commander, Major Gresham, leading one group and the CSM, Sgt Major Osborn, leading the other main group were both killed in action. 

Shoji described the intensity of British artillery fire. He describes how at one stage while resting in a depression at the captured AA battery they suddenly came under howitzer fire from British guns at Happy Valley. His troops in the area between WNC Gap and the AA battery were heavily shelled and a lot of casualties incurred. The vickers guns had already taken their toll in the morning when the Third Battalion first reached the gap. Shoji recorded   how the third battalion continued to press home the attack at WNC Gap on 19 December but owing to the combination of resistance from PB 1, British artillery fire, counterattacks and  lively fire from 'D' Coy WG shelters .......... he incurred very high casualty rates which included the battalion commander. Shoji estimated his casualties as being eight hundred on the 19 December. A shockingly high figure because it would represent an 80% casualty rate for that one battalion.....that is if correct ...... but this is included in his signed statement. The Shoji Butai  waited anxiously for the arrival of the other Japanese regiments.  He writes that by 1240 hours on 19 December the leading units of the Tanaka Butai began to arrive. Shoji met with the leading platoon commander from the Tanaka Butai. He wrote that this was the "first occasion we had met with our own troops since the landing. I judged that the Doi Butai would arrive soon. Just before sunset (19 December at 1900 hours) a report came in that the Doi Butai had arrived at the gap". Rumours had apparently reached the Divisional Commander (Lt-General Sano) that the Shoji Butai had been annihilated near the five-road junction.

The approximate route taken by 2/230 and 3/230 Shoji Butai from the landing ground at North Point 

After WNC Gap had been fully secured on 22 December, the Shoji Butai proceeded down Blue Pool Road towards Happy Valley and started fighting their way up Stubbs Road in the direction of Wan Chai Gap. 

It was Shoji's Butai that first arrived at WNC Gap. The Tanaka Butai (229th Infantry Regt) arrived at Stanley Gap in the afternoon of 19 December. They played no major part in the fighting in this area. During the evening of 19 December the Tanaka Butai followed Violet Hill Path to Middlespur and thence to Repulse Bay. The Doi Butai arrived later on 19 December at WNC Gap having been held up by Rajput resistance at Tai Koo and in fighting with 'A' Coy WG as the Canadian company tried to fight their way back to Stanley Gap.

It was the Shoji Butai that captured WNC Gap and captured the two PBS (PB 1 & 2) on the western slopes of Jardines Lookout. It was they who captured the AA battery at Stanley Gap and it was they who scaled Jardines Lookout from Sir Cecil's Ride to attack the the two mobile platoons and 'A' Coy, WG, albeit later joined by the Second Battalion (2/228) of the Doi Butai. 


Sources

(1)   Translation of statement by Major-General Toshishige Shoji formerly OC 230th Infantry Regiment Japanese Imperial Army concerning the activities of the Shoji Butai during the capture of Hong Kong.  Dated 18 November 1946 ( UKNA WO 235/1015) 

(2) Statement by Sgt Tom Marsh (HKVCA)

(3) Japanese battle maps (Japan Centre for Historical Records). 


Tuesday 15 February 2022

Pillbox 14

Site Visit:    1 February 2022 

Manning:    'C' Coy 1/Mx 


PB 14 is situated on the shoreline below Brick Hill and quite close to the Country Club.  To get to it  - you have to leave the raised concrete pathway known as Mills & Chung Path and go down to the rocky foreshore. Walk past the back of the Hong Kong Country Club clambering over the rocks and you will get to the PB which is reasonably accessible. The PB and Lyon Light structure both remain.  The story is a sad one in that the crew in the two structures were surrounded and eventually all killed - possibly put to death after surrender.  


PB 14 - two loophole PB with stone cladding and rocky rampart providing camouflage

The remains of LL 14 (top left) and PB 14 (centre right)

The entrance to the Lyon Light structure - usually manned by two men 

The front aperture has been partly sealed up with cement and rocks by squatters

Photograph of what is thought to be PB 14 and LL 14 under construction.

Entrance to PB 14 with stone cladding intact

The view across the bay from PB 14

On Saturday 20 December, there was fighting around the government food store, hutments and paddy fields in Wong Chuk Hang, near where the country club is today. One casualty (Pte Bridge) from the fighting was taken to the pillbox (PB 14). On Sunday 21 December, PB 14 reported that they were surrounded  and running short of food and water. On Monday 14 December, an ambulance managed to get through to PB 14 without being shot-up. The one casualty, Private Bridge, was taken away and food water was passed to the PB crew.  On Tuesday 23 December, PB 14 was attacked by grenades. Major Marsh, commanding 'C' Coy described the plight of the gallant crew.

During the day on Tuesday 23 December, several appeals for help came from PB 14 by telephone to which I was powerless to respond. It appears that during the previous night ... some of the PB crew had manned the Lyon Light shelter with a Bren gun to cover the PB and prevent the enemy getting on to it. However, the Japanese had thrown grenades through the shutters, and the occupants were all wounded. I finally tried to get an ambulance through to them again, after all efforts by Royal Navy MTBs and the gunboat [HMS Cicala] had failed to relieve them. I had hoped to obtain an armoured car to relieve them, but none available . ... Early in the morning of 24 December PB 14 again rang up and after a few whispered words about the enemy being on top of their PB the telephone went dead, and I heard no more. (1)

All the crew were killed - some, it is thought, after surrendering the position. 

We don't know exactly what happened because there were no survivors. It seems that two or three men were killed in the Lyon Light structure. It is likely that at some stage on 24 December, the crew in the PB surrendered after some had been wounded or killed by grenades inserted through a loophole.

An extract from war crimes testimony, provided by Lt-Col Ride and Major Crawford, describes how they found the bodies of six Middlesex Regiment soldiers. The men had been tied-up and then killed, some by sword and others by bayonet. They were found on the steps to LL 15 (close to where the Victorian Recreation Club is located today). LL 15 is some 400 to 500 metres from PB 14. 

The testimony:

On the steps leading to Lyon Light No. LL 15 by the roadside, west of Deep Water Bay, were the bodies of six Middlesex other ranks. Their hands and feet were still tied. There were large blood stains on the cutting and on the roadside on the opposite side of the road, and streaks of blood stretching from this, across the road to the steps where the bodies lay in a heap. Their heads had been almost completely severed by sword cuts.

It is unlikely that these men belonged to PB 15 because PB 12, 13 and 15 had been evacuated and  their crews with their Vickers guns had been deployed to Bennet's Hill on 19 December.  (Source: Mx War Diary)

It is likely that these men may have been the remaining crew of PB 14. They may have been marched along to Deep Water Bay and executed opposite LL 15. What a gruesome end for these soldiers.

RIP

Sgt Jack Rich

Cpl William Wood

Pte Reginald Bosley

Pte Walter Ball

Pte Don Burke

Pte Francis Corrigan

Pte Edward Edwards

Pte Douglas Emery

Pte John Jones

Pte James Murphy

Pte Harry Newbury


PB 14 Crew

Pte James Michael Murphy

He was born in Glamorgan, Wales in November 1913. In 1929, aged sixteen, he joined the Middlesex  Regiment as a musician. He married while stationed in Colchester, in 1935, to Rose Mary Vail (1916-1975). They had three children. He left the army in 1936. Following the start Second World War started in September 1939 - he rejoined the Middlesex in April 1940. In March 1941, he was sent out to Hong Kong to serve with the 1st Battalion. His family remained in the UK. 

Pte James Murphy with his family in 1941 (Courtesy David Murphy)


.....................

Sources:

(1)    Appendix to Hong Kong Despatches (UKNA CAB 106/168)

(2)    List of those killed at PB 14 under RIP (Tony Banham)


Acknowledgements:

David Murphy for the photo and information relating to his grandfather Pte James Murphy.

Sunday 13 February 2022

Stone Hill Shelters and Stone Hill Pillboxes

Site visit:  11 February 2022


The photo below shows part of Stone Hill Shelters. On the outbreak of of the battle, these shelters were utilised as Company (Coy) HQ for both 'B' Coy 1/Mx (Middlesex) and 'B' Coy RRC (Royal Rifles of Canada). After the redeployment of troops, following the Japanese landing, the shelters were occupied by East Infantry Brigade for a few days before Brigade HQ relocated to the Prison Officers Club. The shelters are much more extensive than I had realised. On my most recent visit (11 February 2022) I found another five demolished shelters along the ravine (water course) beyond these remaining shelters.

One-time location of East Brigade HQ

The photo above shows two of the five demolished shelters.

The water course runs through a culvert below the road, and near where it emerges, are the remains of another military grade concrete structure. The demolished structure is shown in the photo below. This could have been a splinter proof shelter or perhaps another PB in addition to the two PBS located nearby (Stone Hill PB 1 and 2)
 
The ruined structure across the road near the culvert

The map extract below shows the location of the shelters below Stone Hill in a ravine. It also shows the two pillboxes known as Stone Hill PB1 and PB 2. They are actually only 10 to 20 metres apart .


Sketch map showing the PBs

The two PBs are quite close together (10-20 metres). They are between Stanley Gap Road (originally known as Island Road) and the water catchment path on the hillside above. PB 2 is buried and inaccessible.  PB 1 shows evidence of squatters having occupied the pillbox and some of their furniture and possessions remain in the PB including a hurricane lamp  that looks much like those used in 1941. 

PB 1 at Stone Hill with squatters belongings left in the PB.

loophole at PB 1 with shutters intact.


PB 1 Stone Hill

Stone Hill PB 2 - The PB is buried but in the above photo you can see one of the loopholes


...........................................

Friday 11 February 2022

Beach Defence Unit : PB 30 and LL30 at Turtle Cove

 Site Visit:  11 February 2022

Manned by: 'B' Coy 1/Mx


Both the pillbox (PB30) and the Lyon light structure (LL30) remain in reasonable condition. They are located at Turtle Cove one of the most scenic beaches on Hong Kong Island.  A passageway protected by a stone wall links the PB and LL about 10metres apart. I was able to get inside the PB. In the PB I found the voice pipe and likewise the other end of the voice pipe was still in situ at the LL.  The voice pipe allowed communication between the LL and the PB.  A primitive system of communication but it worked and was of course used in warships. The PB has two-loopholes. Its pebble cladding (camouflage) is missing.

Turtle Cove

PB 30 a two-loophole pillbox with shutters intact but stone cladding entirely missing

Vickers MG firing positions


The rocky and stone cladded wall protecting the path to the Lyon Light structure

Inside the Lyon Light structure showing concrete fixture for the search-light


There were two retractable bunks on this wall by the steel entrance door.

Bench/shelf for generator to power the searchlight

Voice pipe in Lyon Light structure (missing the brass speaking cup)

Voice pipe exiting the Lyon Light structure and heading toward the PB

The voice pipe attached to the ceiling of the PB near the commander's observation tower

Voice pipe in the PB

The voice pipe enters the PB from the back wall


..........................................


Thursday 10 February 2022

Aberdeen Reservoir Military Structures


PB at the dam at Aberdeen Upper Reservoir

During the Battle for Hong Kong 'C' Coy Winnipeg Grenadiers had their Company HQ situated near the Upper Reservoir.  There are still a number of war ruins to be seen around the area of the reservoir.  A metal road (closed to vehicles), Aberdeen Reservoir Road, leads from Wan Chai Gap to the Aberdeen Upper Reservoir. The Winnipeg Grenadiers (WG) Battalion HQ was located at Wan Chai Gap. As you approach the Upper Reservoir from Wan Chai Gap a road on the right-hand side leads off to the Lower Reservoir and from there to Aberdeen. The naval dockyard was operated from Aberdeen and the main naval base had relocated from Victoria and occupied the former Aberdeen Industrial School (AIS). To the south and overlooking the Upper Reservoir was the hill feature known as Bennet's Hill. Aberdeen and the vital naval facilities were immediately south of this hill feature. 

Aberdeen Upper and Lower Reservoirs

The inverted sketch map (south-up)  shows the positions of the remains war rains in 'C' Coy WG area around the Upper Reservoir and Bennet's Hill.

Inverted sketch map showing the dam and the position of war structures


'C' Coy was commanded by thirty-four year old Major John Albert Bailie. 
The officers and senior ranks comprised:

Major John Bailie
Captain Edward Walker
Lt Railton Campbell
Lt William Nugent
2/Lt John Parks

CSM Frank Logan
CQMS William Pigott

C Coy's area was important because of the reservoirs supplying drinking water to the Island and because of the proximity to the Aberdeen naval facilities. 'B' Coy WG were positioned around Po Fu Lam Reservoir  for the same reason. 'A' Coy was at Shouson hill before being destroyed at Jardines Lookout and Stanley Gap on 19 December. 'D' Coy were positioned at Wong Nai Chung (WNC) Gap and were pinned down at their company HQ opposite West Brigade HQ from 19 to 22 December.

Sgt Leo Berard, No. 12 Platoon Sgt from 'C' Coy recalled seeing one of the privates put his rifle muzzle  under his chin, press the trigger and take his own life. Berard does not state the date but presumably it was after the Japanese landings on the Island. Berard commented that "the stress and anxiety caused by our position and the fear of capture by the Japanese were more than some of the men could tolerate".  (See Note 1) 

Line of Gaps PB between Wan Chai Gap and Aberdeen Upper Reservoir

Water tank near 'C' Coy HQ

I assume the structure shown above is a water tank. There is a similar one at Stanley Gap.  After passing the water tower there is a set of two (now bricked up) Type 'A' splinter proof shelters with cement globule cladding for camouflage. 

Set of two splinter-proof shelters on Aberdeen Reservoir Road

This collection of five adjoining splinter-proofs were most likely used as 'C' Coy HQ 

A set of two splinter-proof shelters at the road junction (Upper Reservoir and Lower Reservoir Roads)  

The same set of two shelters at the road junction (just after Coy HQ)

The roof of the PB at the Northern end of the dam

The dam (sometimes referred to as the bridge) from north to south with Bennet's Hill in the background


Flt Lt Donald Hill was in charge of a party of RAF personnel based at the Aberdeen Industrial School  (AIS) which had been commandeered by the Royal Navy. On 13 December, he was ordered to set up anti-aircraft light machine-guns (AALMG) on Bennet's Hill and on a nearby hill referred to as Reservoir Hill. From 15 December. Donald Hill and the RAF personnel were ordered to report to Major Bailie commanding 'C' Coy WG. After the Japanese landings naval parties (mainly HKRNVR) also joined 'C' Coy.

'C' Coy had three platoons, 10, 11 and 12. Each Platoon HQ was linked by telephone to C Coy HQ. After the inclusion of the airmen and naval personnel and other assorted personnel, Sgt Leo Berard described how his platoon (No. 12 Platoon) which he commanded in the absence of a subaltern (Lt Parks had bee reallocated) totalled sixty-eight men. This was twice the normal size of a platoon.  A lot of weapons training, including use of grenades and mortars had to be carried out after the battle had begun. On one occasion, Pte Ralph Forsberg, while on sentry duty, noticed a small boulder that had not been there before. Berard ordered him to take a shot at it. It turned out to be a Japanese sniper under a groundsheet resting on his heels and silently observing the company positions disguised as a rock. (2) 

Donald Hill write in his diary for 19 December that Lt Campbell was ordered to take a platoon from 'C' Coy to join a counter attack on WNC Gap. The Upper Reservoir, Bennet's Hill and AIS were heavily shelled, mortared and bombed but the main attack came on 24/25 December. On 24 December Hill and other members of 'C' Coy  WG are positioned to guard the dam over the Upper Reservoir (shown above). Hill wrote in his diary for 24 December: "My party consists of twelve Canadians and ten RAF. Up to midnight (24 Dec) all is quiet. Soon after midnight heavy firing starts just across the bridge. The Japs' (sic) weird war-cry is plainly heard, and soon a small party of Canadians retire over the bridge [from the north side]. They report a heavy attack by Japs who crept up on them and broke through. We open up with everything we have across the bridge. ........ The Japs start shelling us and confusion sets in, and the men start leaving their posts. (3)

Hill describes how Major Bailie came down the road to their position waving his revolver and shouting at the men who had left their posts to return to their positions. Hill described how some of the troops obeyed but others did not. Bailie tried to rally and cajole the men and called for volunteers to cross the dam with him. He set out across the bridge on his own, at first nobody, other than Hill, followed. The Japanese had moved away from the dam, and the two men reached the northern end of the dam without injury. They must have then withdrawn to the southern end of the dam. Hill describes how a mortar was set up but the first bomb fired hit the branches of an overhanging tree and exploded causing severe injuries to some of the crew. The operator lost an arm and another soldier had serious leg injuries. An ambulance eventually arrived from Aberdeen to take the injured to AIS. Hill described the chaotic situation at the Upper Reservoir. Discipline had broken down. At one stage Lt Campbell and 2/Lt Parks threatened to arrest Major Bailie who in turn threatened to arrest his men.  

The next day, Christmas Day,  there was a truce during the morning and the surrender took place in the afternoon. The battle was over - these war structures remain around the reservoir. These days, when I cross that dam I think of Major Bailie charging across - trying to lead by example - and Flt Lt Hill close behind. I can imagine the war cries of the Japanese and the night sky lit up by tracer rounds and explosives ..............and the fear.  


Notes

1. Page  75 of 17 Days until Christmas (1997) Leo Berard
2. Page 82 of 17 Days until Christmas (1997) Leo Berard
3. Pages 267-268 The Code of Love (2000) Andro Linklater


Tuesday 8 February 2022

Mount Nicholson AOP

Visit Date:  9 February 2022

Site: The artillery observation post (AOP) on the southern slopes of Mount Nicholson

The AOP is in quite good condition. The photo below shows some of the original pebble-like cladding (cement globules) used as camouflage on what was then stony ground with low vegetation. Only one of the two steel shutters (for the observation aperture) is intact. The shutters were opened by being lowered outwards. The structure showed signs of having been occupied by squatters and the inside walls had been painted blue. A tough life for who ever occupied it as a squat - without running water, toilet facilities and quite a climb to get to it, but at least solid, dry and well ventilated. I suppose the same applied to the gunners who occupied it but only briefly during the battle. 

Mount Nicholson AOP

I had not been to this artillery observation post (AOP) for some years. I was walking from Pottinger Street in Central to Stanley by way of Black's Link. At Middle Gap I took a path on my left (northwards) marked by ribbons which led steeply down to the area at the back of Rosaryhill School.  This was the wartime site of St Albert's Hospital. Nearby there is a prewar covered reservoir and more recent water work structures.  A path led up to the spur on which  the AOP stands and another path nearby led to West Brigade HQ hugging the slopes of Mt Nicholson above WNC Gap Road. 


The roof and capped ventilation shaft with Mount Cameron in the background

The rear of the AOP and entrance door

The one remaining steel shutter and cement globules (more often stones were used as cladding).

Close up of steel shutter

The inside of the OP (painted blue  by squatters)


Close-up of the steel door showing three bolts, two hinges and the covered spy-hole


This is taken from the front of the OP - it looks out in a  north-east direction


Front of the OP showing the good job done of clearing up the site and making it more accessible


Sketch Map - How to get there:


Assuming you start by walking from Wan Chai Gap. Continue along Black's Link towards Middle Gap. As you approach Middle Gap look for a path on the left leading sharply downhill with ribbons. There is a deep ditch on your right. Go down about 100 metres and you will reach a concrete hut (waterworks).  Look to your right and you will see a bed of concrete (roof of a water tank?) Go to the back of this concrete structure and look for a path snaking top the hillside. You will spot it by the ropes. As you go up the path you will see the remains of steps. This path will bring you out at the AOP. 


....................................